Week 6: Notch Project
Audio Reactive Visual
For my ‘final’ Notch project I wanted to focus on making an audio reactive visual. This is the final product of that:
My favorite part of Notch has been the Audio Reactivity option because there are so many different ways you can connect parameters and fine-tune to them to react to the audio in specific ways.
I did struggle with this project as a) I am still learning the program so I am limited by my knowledge, and b) I really had no straight plan on what I wanted the visual to look like. I wanted to see what I could create just from scratch, going off of what I knew I could control and what I have been learning these last couple of weeks.
Overview of Project File
Nodes can be broken up into 4 different groups.
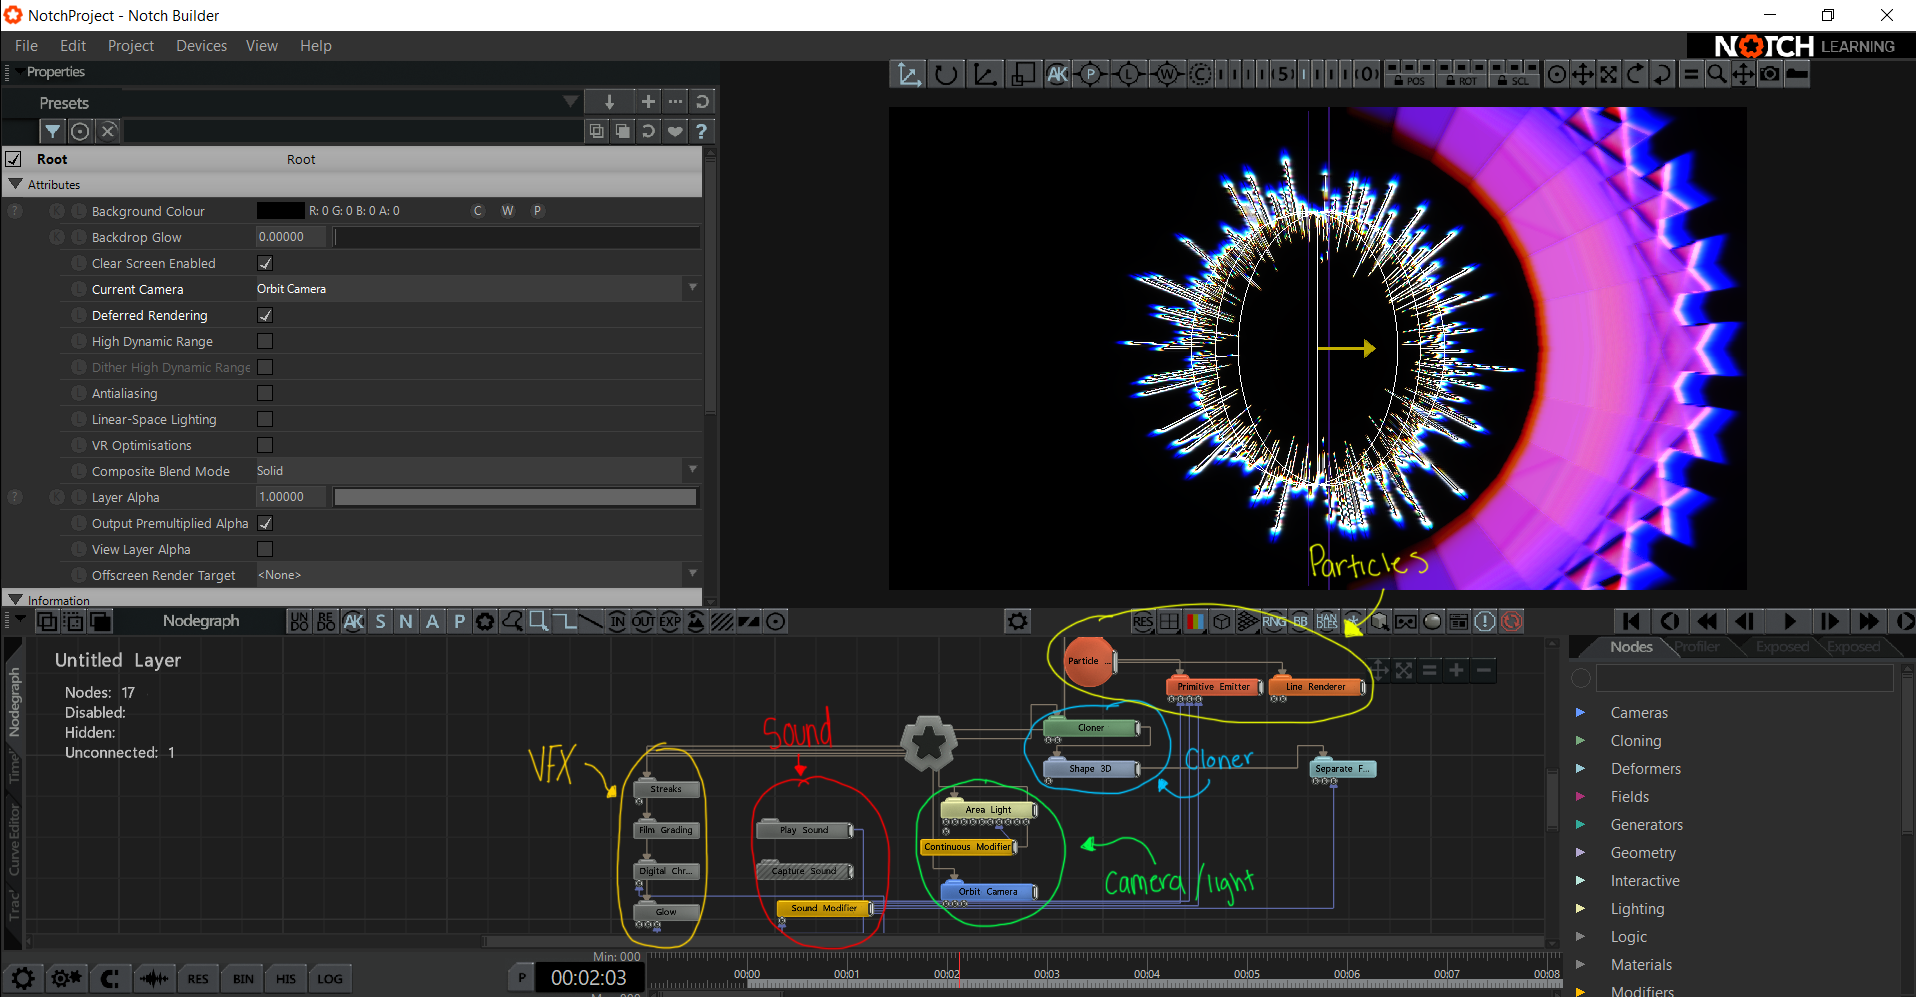
Red
- There are three main sound components. Play sound = the song(s) that can be played. Capture sound = not currently connected but when connected it takes input from the computer and reacts to noises that are happening in the real world ie. my voice. Sound Modifier = is taking the input from either Play Sound or Capture sound and modifying different node parameters depending on the waveform.
Yellow
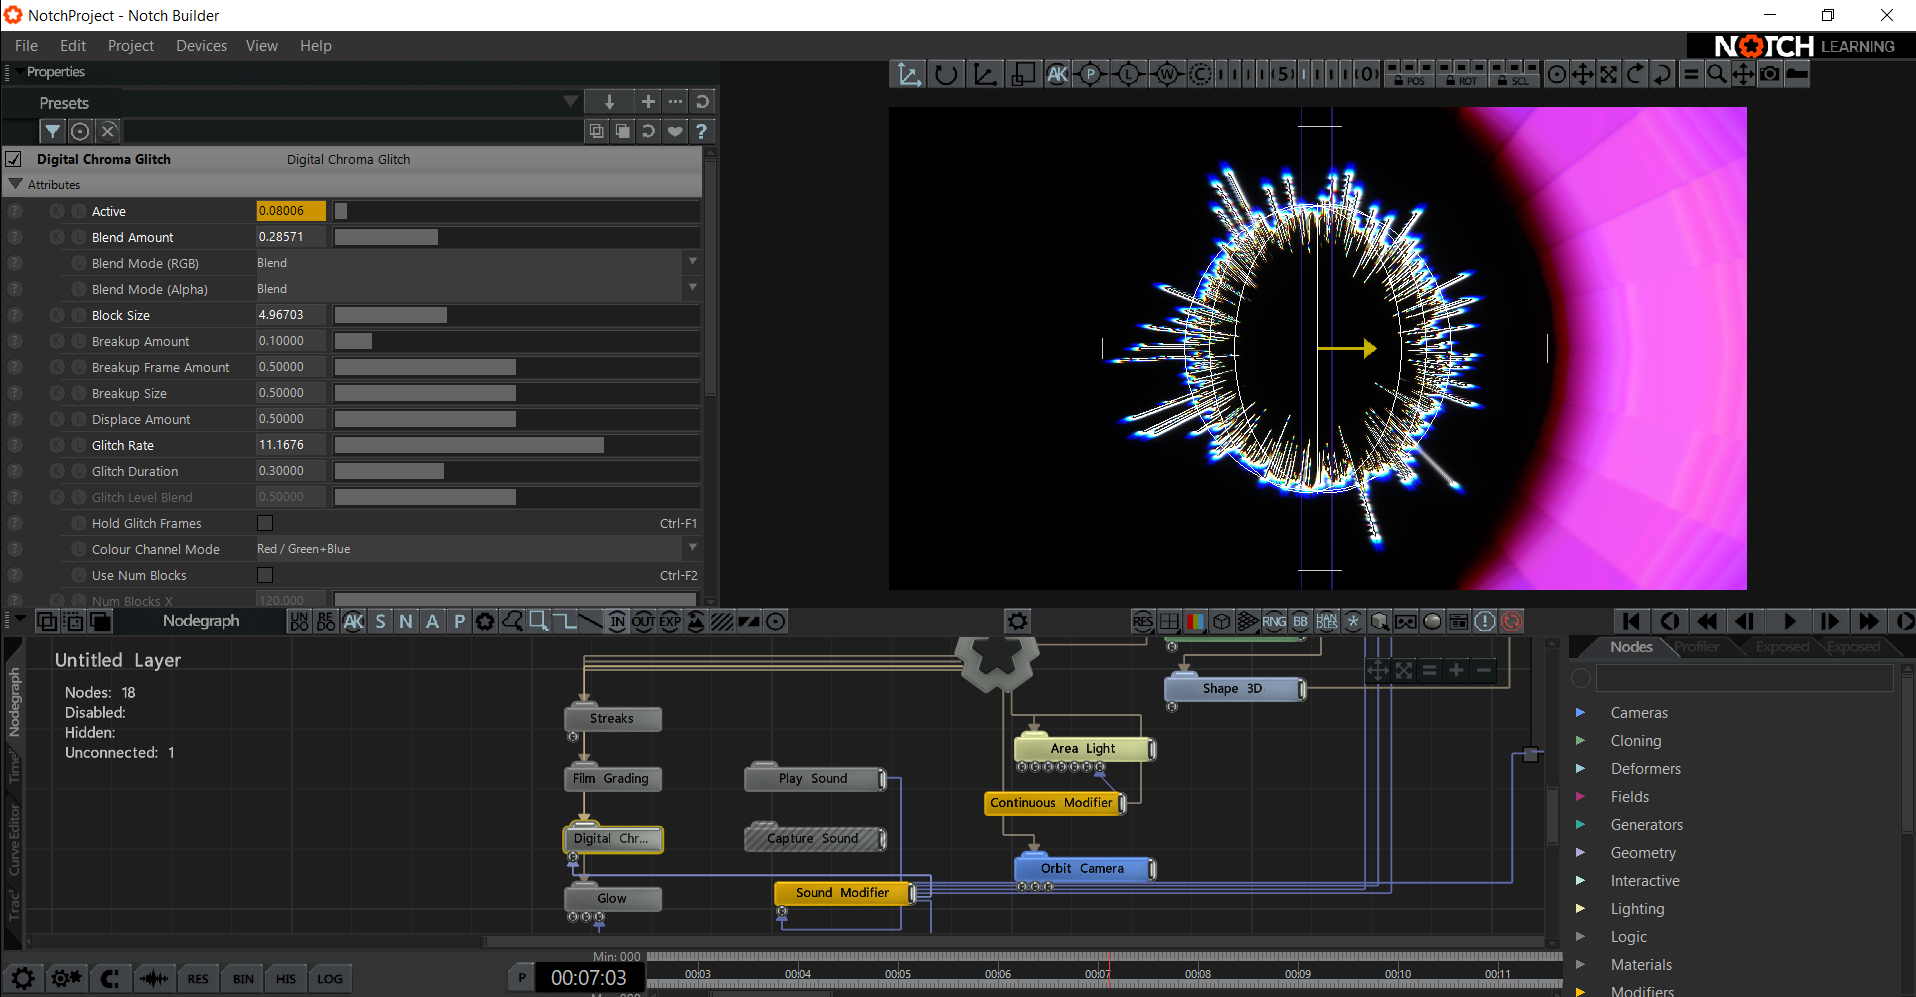
- These VFX are added to the whole project. Streaks, film grading, digital chroma glitch, and glow. Digital chroma active state and the glow‘s intensity are both controlled by the sound modifier. All of them together create the radial sphere that is surrounding the inner circle of particles. They are also causing the visual in the back to pulse.

Green
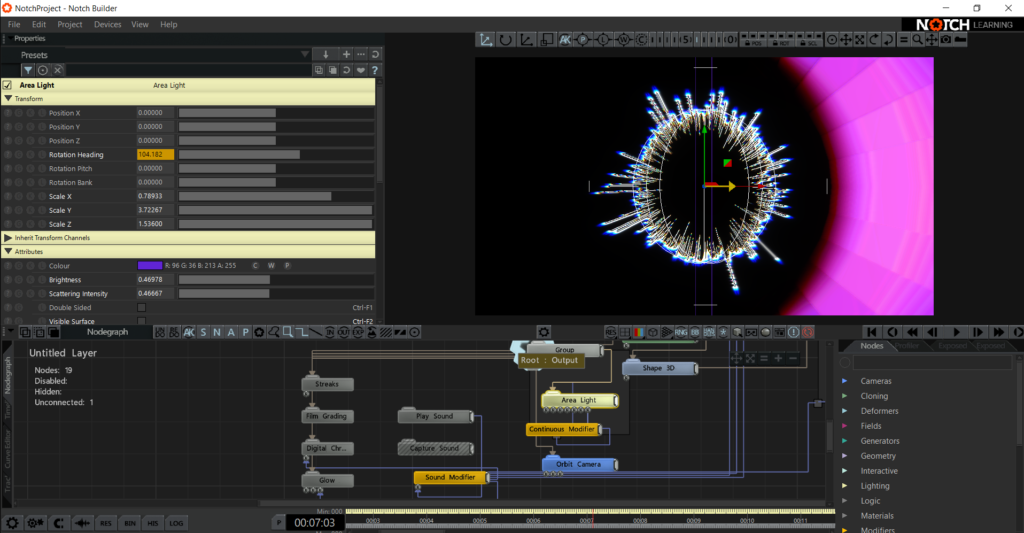
- The Area Light is what creates the ‘sun’ effect in the back. Its rotation heading parameter is controlled by a Continuous Modifier making it spin in place. As it is spinning it is illuminating the 3D shapes made by the cloner. The Orbit Camera is in place so I could easily manipulate what I was looking at.
Blue:
- Here I have a cloner system with a Shape 3D attached to it. The Cloner is in radial mode with a cube Shape 3D. It does not become visible until the Area Light hits it as it is turning. There is also a Separate Faces Deformer that is separating the faces of the cubes from each other slightly. It’s offset parameter is also controlled by the sound modifier.
Yellow:
- The circle in the middle is created using a particle system. The primitive emitter‘s scale x,y, and z are controlled by the sound modifier causing the lines being created by the line renderer to shoot out during certain points of the beat dropping.

Overall, I think that this project was a success for a beginner. It has opened up my eyes to what is possible with Notch when it comes to real-time visuals. If I were to do this project differently I would add more cameras to it and make sure that the visuals I created can be viewed from multiple views. Maybe even have an option where the camera view is controlled by the user. It is definitely something to keep in mind for my final project.
Here is the notch file.